Workday Time Tracking provides workers many options for entering time.
On this job aid:
Enter Time Using Check-In/Out - Browser
Enter Time Worked from Mobile Device
Calendar-Based Time Tracking
Enter Time Using Check-In/Out
On your home page, click on the Time application
- On your home page, click on the Time application

- Click Check-In.

- Time Type Hours Worked will be selected for you. Enter any details if needed.
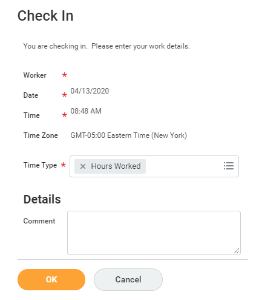
If you have multiple jobs, you can choose the position you are entering time for.

If you have multiple positions, it is very important that you select the correct position on this screen. This will ensure you are clocking the correct hours for the specific position you are working that day.

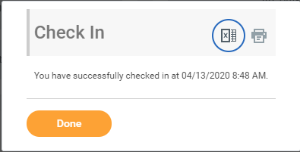
Click OK, then Done.
- Once checked in, the time will appear above the check-in button.
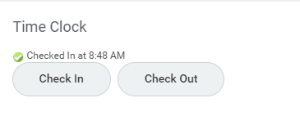
- After your work is completed, navigate back to the Time application and click Check Out.
- Select a reason for check out.

Click OK, then Done.
View Details of Submitted Time
From the Time application:
- Click on select week and pick a date
- Select a time block to view detailed information about your time entry.

- A window with details will open.
- On the Reported tab, view reported work time.
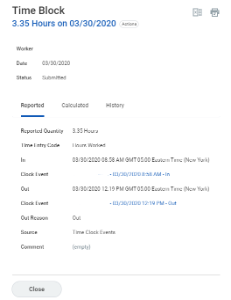
- Click the Calculated tab to view the calculated time.
- Click the History tab to view the process and approval history of a particular time entry.
Modify Previously Reported Time
Please contact your manager for any timecard modifications and adjustments.
Check In/Out (Hourly Employees) - iPhone / iPad
Mobile Check-In/Out is not available outside the Lynn University campus. You must be inside your building to check in/out.
iPhone
From the Time Tracking app:
- Tap Check-In/Out.
- Tap Check-In when you start working.
- Select the Time Type from the prompt. Add additional information as needed, including Cost Center, Job Profile, Waived Meal/Break, and Division. Select the Project as Time Type, if applicable.
- Tap Done.
- Tap Check Out when you stop working.
- Select a Check Out reason, such as Break, Meal, or Out. Use the Check-In/Out feature as required throughout the day.
iPad
Use the Time Tracking app to enter time or to check-in/out.
From the Time Tracking app:
- Tap Enter Time.
- Tap a day of the week for your time entry. You can also use the auto-fill feature to automatically fill out your time based on the time you entered in a previous week.
- Confirm the Time Type. If selecting a Project, from the Time Type prompt, select Project > Project Phase and/or Project Task (if required).
- (Hourly) Tap and select the In and Out time and your Reason from the prompts.
- Select any additional information your organization requires, including Cost Center, Job Profile, Waived Meal/Break, and Division.
- (Non-hourly) Tap the Hours field and select the amount of time you worked.
- Enter any additional information.
- Tap OK. If incorrect, an error message will display.
- Repeat the process to enter additional blocks of time for the day or week, as needed.
- Tap Submit when you are ready to send your hours for approval.
- Tap Submit to confirm that the reported hours are accurate and to authorize payment. You will see any approvals needed once you submit your time.