Workday Time Tracking provides workers many options for entering time.
On this job aid:
Enter Time Using Check In/Out - Browser
Enter Time Worked from Mobile Device
On your home page, click on the Time application

Calendar-Based Time Tracking
Enter Time Using Check In/Out
- Click Check In.

- Time Type Hours Worked will be selected for you. Enter any details if needed.
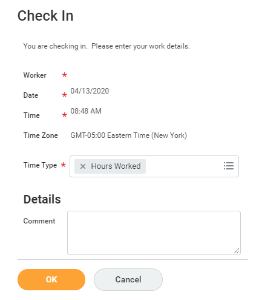
- If you have multiple jobs, you can choose the position you are entering time for.

- Click OK, then Done.
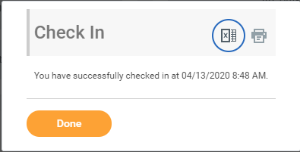
- Once checked in, the time will appear above the checked in button.
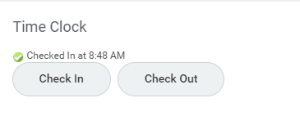
- After your work is completed, navigate back to the Time application and click Check Out.
- Select a reason for check out.

- Click OK, then Done.
View Details of Submitted Time
From the Time application:
- Click on select week and pick a date
- Select a time block to view detailed information about your time entry.

- A window with details will open.
- On the Reported tab view reported work time.
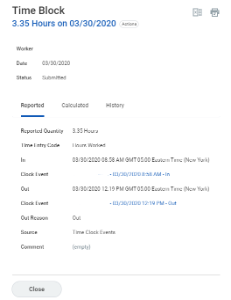
- Click the Calculated tab to view calculated time.
- Click the History tab to view the process and approval history of a particular time entry.
Modify Previously Reported Time
Please contact your manager for any timecard modifications and adjustments.
Check In/Out (Hourly Employees) - iPhone / iPad
Mobile Check In/Out is not available outside Lynn University campus.
iPhone
From the Time Tracking app:
- Tap Check In/Out.
- Tap Check In when you start working.
- Select the Time Type from the prompt. Add additional information as needed, including Cost Center, Job Profile, Waived Meal/Break, and Division. Select the Project as Time Type, if applicable.
- Tap Done.
- Tap Check Out when you stop working.
- Select a Check Out reason, such as Break, Meal, or Out. Use the Check In/Out feature as required throughout the day.
iPad
Use the Time Tracking app to enter time or to check in/out.
From the Time Tracking app:
- Tap Enter Time.
- Tap a day of the week for your time entry. You can also use the auto-fill feature to automatically fill out your time based on the time you entered in a previous week.
- Confirm the Time Type. If selecting a Project, from the Time Type prompt, select Project > Project Phase and/or Project Task (if required).
- (Hourly) Tap and select the In and Out time and your Reason from the prompts.
- Select any additional information your organization requires, including Cost Center, Job Profile, Waived Meal/Break, and Division.
- (Non-hourly) Tap the Hours field and select the amount of time you worked.
- Enter any additional information.
- Tap OK. If incorrect, an error message will display.
- Repeat the process to enter additional blocks of time for the day or week, as needed.
- Tap Submit when you are ready to send your hours for approval.
- Tap Submit to confirm that the reported hours are accurate and to authorize payment. You will see any approvals needed once you submit your time.