On this Job aid:
Your Worker Profile page displays employee information, including your office location, phone number, and compensation. Note that the visibility of sensitive information is controlled by individual users' security profiles.
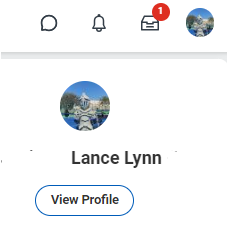
To access your Worker Profile page, click your Profile icon > View Profile.
Worker Profile Overview
Click your picture (or cloud icon) on the top right of the screen to access the profile page.
When you arrive at your Worker Profile, you’re presented a summary of your employment record:
- The Blue Ribbon Menu
- Your Manager
- Your Job Details
- Summary card (if you have other profiles like student, you can switch between your profiles in this area)
Blue Ribbon Menu
The Blue Ribbon Menu of the Worker Profile is a ‘one-stop-shop’ for your employment record. By default, you arrive on the ‘Summary’ tab. Each section offers information related to that subject, and many sections (e.g. Time Off, Contact, Personal, Performance, & Career) offer quick access to various actions (e.g. requesting time off, changing contact/personal information, and updating career history).
You can also use the Actions Button, just under your name, to view a list of all available actions you can take; more on this in the next section.
Ribbon Menu / Actions Button
The Actions Button is synonymous with ‘Additional Actions’ buttons that you will find next to business objects in Workday. Actions buttons allow you to see available actions for whatever object you’re viewing.
In the case of the Actions Button on your Worker Profile, the menu that appears provides you with available actions you can take on your own record.
Below is a limited list of the sections (most common) within Actions and a brief description of what they offer. Your records may look different depending on your position or access rights in Workday.
Action | |
|---|---|
| Benefits | The Benefits section in the Actions menu allows you to request a Benefit Change, View Benefit information (current elections, beneficiaries, dependents, forms, history, etc). |
| Business Process | Primarily for managers, the Business Process section in the Actions menu allows you to manage delegation settings and view specific information related to business process actions for you as an employee. |
| Payroll | The Payroll section of the Actions menu allows you to manage your Tax Documents printing elections and view your tax documents, in general. |
| Personal Data | The Personal section of the Actions menu offers you access to View/Change your Contact Information, Emergency contacts, and Personal Information. You can also manage your self-identification items (Veteran Status and/or Disability), Complete an I-9 form (as needed), and/or Maintain Payment Elections/Direct Deposit. |
| Time and Absence | The Time and Leave section offers access to Enter Time (for hourly employees), Request Absence, or View Absence Balances. |
| Worker History | The Worker History section is your go-to place to find all actions that pertain to you as an employee. Clicking ‘View Worker History’ presents a table with Business Processes (such as your Hire), associated Dates, and statuses all in one place. |
Popular Student Apps
Academic Application
1. Press Academic Dashboard to open.
The Academics Dashboard is a customizable app with common actions and reports as: Actions to Do, Important Contacts Support Network, My Holds, Current Schedule and links for Planning and Registration, Academic Records, Advising, and General Help. This tasks and reports will appear, and students can customize it to their liking.
To Customize the Academics Dashboard as needed:
- On the title bar of the application, press the setting icon to add, delete and rearrange reports and tasks.
- The Configure Worklets screen will be in display:
a. To add a worklet, press the sign button (the minus sign to delete ), press on the prompt and select from the All list or search by typing the name of the Worklet. (Some of the tasks and reports are not available as worklets.)
b. All worklets can be rearranged by pressing the up and own arrows in the order column.
The Academic Dashboard can be customized by typing Configure My Worklet Landing Page on Workday's search bar then selecting Academics in the Landing Page.
Favorite Application
The Favorite app can link what student have added in Workday. The app can be found on the Menu Bar, links, magnifying icon, related action icon and etc.
How to save a course link in Favorites? - Example
- From the Find Course Reports; hover at the end of the course link and press the related actions icon, press Favorites from the Actions Menu and press Add.
- To Open: Press the Favorite App from the Navigation Menu where the course will be stored. Press the link to open the course information.
Shortcuts
Shortcuts are a quicker way to find tasks and reports. There is a 10 shortcuts limit on display.
(Suggested shortcuts student's may be interested in creating: View my Enrolled course, View my Academic Progress, View My Academic Report, View my Action Items, View my Grades and View Statement.)
- Workday Home page, press the navigation menu and press the Shortcuts tab
- Press button to add specifics shortcuts on the Shortcuts tab.
- From Find Shortcuts search, type as an example - View My Courses
- Press the button to add the shortcut to the Menu.
- Press to return to the shortcut list (to run to the shortcut simply click the link.
Manage Shortcuts
- To Rearrange, press then drag the shortcuts to the new location wanted. Press Save changes to save the new order.
- To Delete, press and then the besides the shortcut. Press Save changes when finished.
Workday Home Button
Click the Workday icon to go back to the main page for students, regardless of where they are in the Workday system. Workday will provide a back arrow; if there isn't one, use the browser's back arrow to go back to the previous screen.
Workday Search Bar
In the Workday system search by entering questions or keyboards with the correct spelling.
- Three Characters can substitute word searches such as typing gra for View My Grades reports.
- Keywords can be used to find, view, contact, name, academic, etc.
- Workday has the ability to search through the whole system. To isolate student results, select People or tasks and reports then enter the search criteria.
Workday system displays Blue as a clickable link that will take the students to more information.
View Profile - Student Profile Page
Student profile page displays categories and a quick Actions Menu to view and edit Student information.
- Student can view their profile by pressing their picture (top right corner) and press to have a full access.
The Workday Worker profile will default if the student is also a UMMC EMPLOYEE.
To switch to the student profile, press Summary Category, then under Student section, press student name to display profile.
Actions Menu
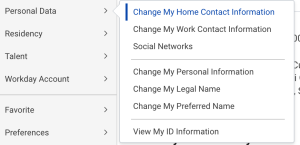
The Actions Menu displays a shortcut menu for Personal Data to have a fast view / change home, Work Contact Information, Personal Information, Legal and Preferred Name and ID information.
Student Profile Categories
On each individual Student profile page, categories will be on display at the left side of the screen; those categories are:
- Displays the student information, academic progress and account activity. (UMMC employees can switch to their student profile by clicking their name link under the student section).
- Names: presents legal name and Preferred Name. The Action button located under the student picture which allows students to start the Legal Name change process as well as edit their preferred name which will change in Workday and MySite.
- Personal Information: presents Gender, Date of birth, Martial Status, Hispanic or Latino, Race/Ethnicity and Citizenship Status which all of them can be edited.
- Residency: presents residency status
- IDs: Documents such as National IDs (Social Security Number) can be verified and edited.
- Documents: Other documents can be added under Students Documents and Personal Documents tabs. (Pre-Registration attest documents can be found under the Reviewed Documents tab).
- Students information including Institutional Contact Information, Home and Work address, Phone Numbers and Email can entered.
- My friends and Family: emergency contact
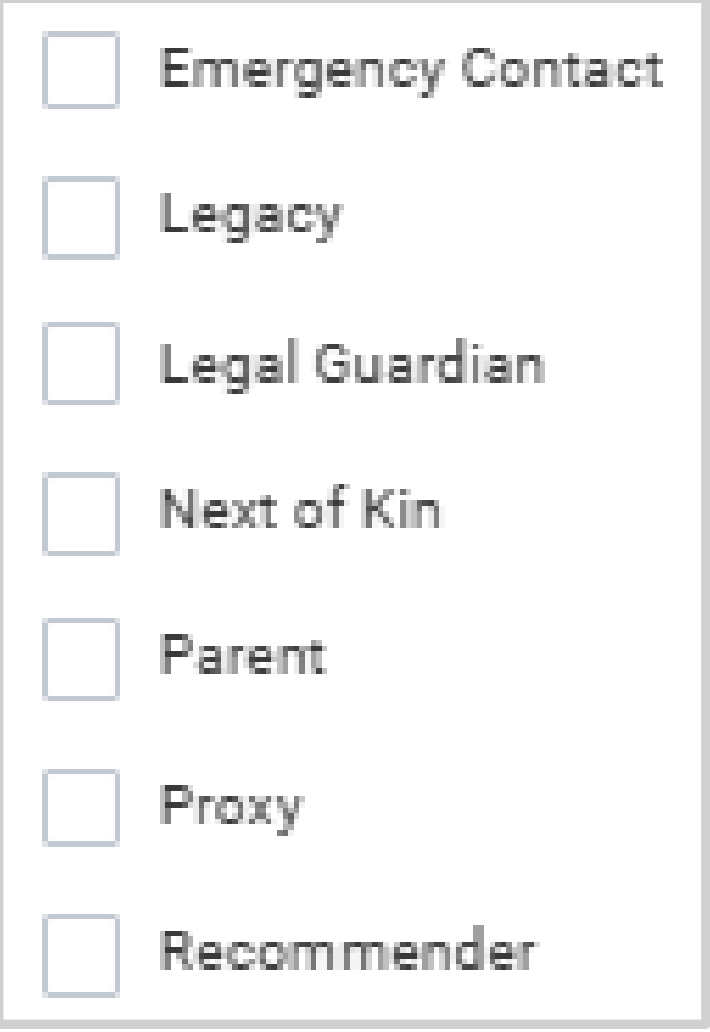
- Emergency contact: can be entered by Relationship Type.
Presents students academic information:
- Overview: presents General information of the program of study being pursued and important dates surrounding that program of study.
- Current classes: lists information for all currently enrolled courses and activities for the current academic period. Both students and administrators are able to drop/withdraw courses based on date controls and security.
- Plan: Not all schools provide a plan in Workday. In case an advisor has created one it would be listed to assists the student in registering for courses. Courses can be registered without any plans.
- Academic History: Lists all courses the student has completed along with the Academic period totals, Cumulative totals and student standings, which include Attempts, Unites Earned, GPA units (Period and Cumulative GPA) and Class Standing information to which makes up with the students transcript.
- Academic Progress: is a list of all academic requirements needed to graduate from UMMC for the program (s) of Study a student is pursuing. Along with the Academic Requirements; students will see a percentage of satisfied requirements, Cumulative GPA, Unused Registrations and Overall Academic Progress.
- External Records: Education Test Results reported to UMMC.
- Students have access Make a Payments, View Statements, find out Total Account Balance and what is Due Now.
- Students have the ability to see if there are any action item to complete, active holds and resolved holds under the categories for Financial Aid, Admissions and Onboarding; as well as Instructions on how to resolve the hold will be listed on all students holds.
Pages of students profile can be exported to an adobe PEF file or save/printed by pressing the icon located on the right of the students picture. Press clear all and then select the pages before saving or printing.
Popular Student Apps
Academic Application
1. Press Academic Dashboard to open.
The Academics Dashboard is a customizable app with common actions and reports as: Actions to Do, Important Contacts Support Network, My Holds, Current Schedule and links for Planning and Registration, Academic Records, Advising, and General Help. This tasks and reports will appear, and students can customize it to their liking.
To Customize the Academics Dashboard as needed:
- On the title bar of the application, press the setting icon to add, delete and rearrange reports and tasks.
- The Configure Worklets screen will be in display:
a. To add a worklet, press the sign button (the minus sign to delete ), press on the prompt and select from the All list or search by typing the name of the Worklet. (Some of the tasks and reports are not available as worklets.)
b. All worklets can be rearranged by pressing the up and own arrows in the order column.
The Academic Dashboard can be customized by typing Configure My Worklet Landing Page on Workday's search bar then selecting Academics in the Landing Page.


