This job aid provides managers step-by-step instructions on how to use Workday for employee* and contingent worker** job changes. Additional Employee Services approvals may be required.
Contingent Worker | A worker who is not on Lynn's payroll and not eligible for benefits (i,e., consultants, contractors or vendors). They will display in workday a [C] next to their name (i.e., John Doe [C] ) |
| Employee | An individual who works directly for Lynn University, is paid through Payroll and may be eligible for university benefits. |
On this job aid:
Transfer, Promote, and Change Job
Change Contingent Worker Details
Convert Contingent Worker to Employee
Transfer, Promote, and Change Job
If a promotion or other job change is within the same department, it is a one-person task. If the change involves a transfer between departments, it is a two-person process as involves current and future manager. The manager in the current supervisory organization initiates the transfer of the employee to the receiving manager. The manager in the incoming supervisory organization performs another set of actions to receive the employee.
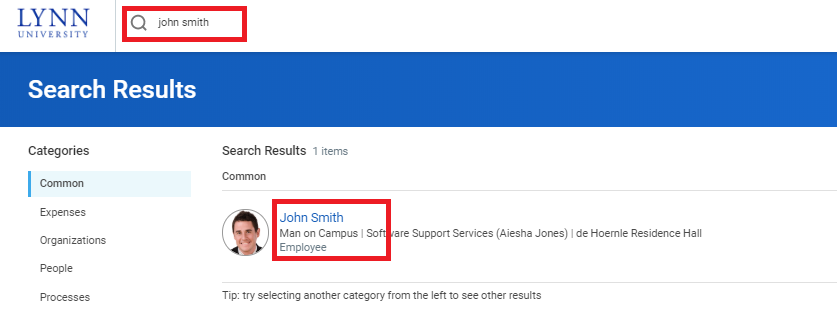
- Search staff's name

- From the targeted employee's profile:
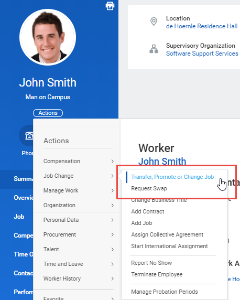
- Select the Actions
 button.
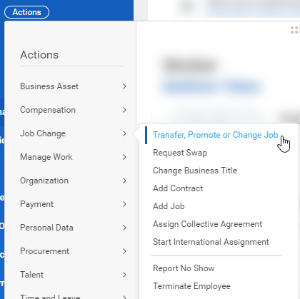
- Select Job Change > Transfer, Promote, or Change Job to display the Change Job page.
- Click the Edit
 icon to enter or modify the information. Red asterisks denote required fields.
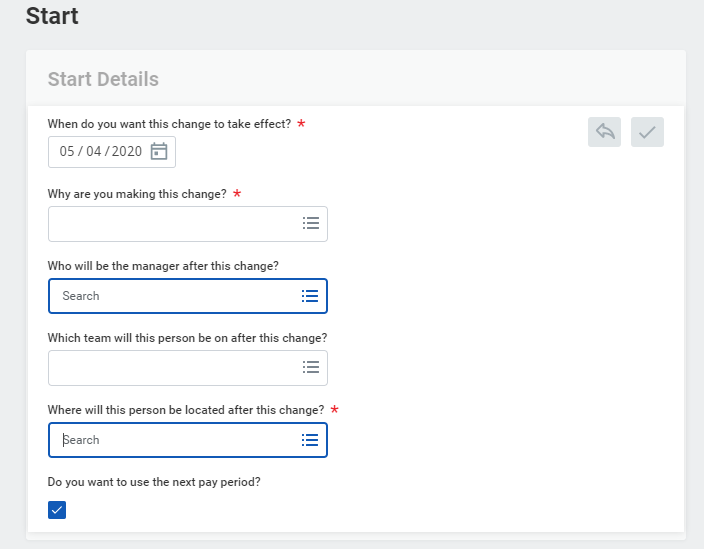
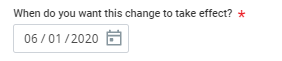
- For the start date, make sure you verify the date with Employee Services as the changes may affect payroll, benefits, etc.
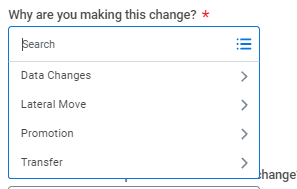
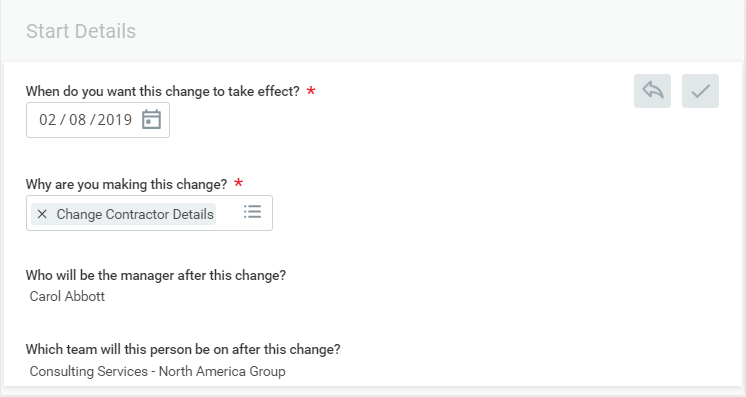
- Select a reason for the change
- If the employee is to report to a new manager, enter the new supervisory organization.

- For the start date, make sure you verify the date with Employee Services as the changes may affect payroll, benefits, etc.
- Click Start. A progress bar displays to guide you through the process.

- Click Next to move through the various sections or click Summary to edit using a single-page view.
Click the Edit
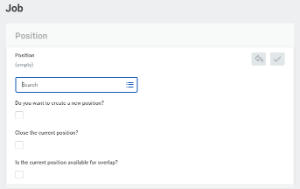
icon to enter or modify the information next to each section: Position, Job Profile and Business Title.Note: For promotions and other position changes, your new position and job profile needs to be already available in Workday prior to the job change.
- Complete the Academic tab for faculty and other academic staff (if applicable)
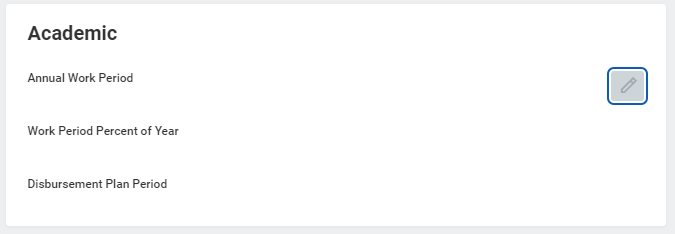
- Salary changes will require to complete the Compensation tab.

- Once all edits are made, click Submit. You can also save your work for later.

Your request will go to Employee Services for approval. Click the Details and Process arrow and navigate to the Process tab to view the next steps in the Change Job business process. The Status field indicates whether there are any required actions or steps to complete.
Change Employee's Location
- Search staff's name and select employee from search results.
- From the employee's profile, select the Actions button.
- Select Job Change > Transfer, Promote, or Change Job to display the Change Job page.
- Click the Edit icon to enter or modify the information. Red asterisks denote required fields.

- Enter the effective date for the change
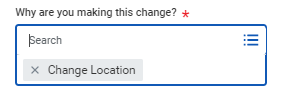
- Enter a reason for change. Select Change Location.
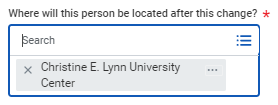
- Under location, click the X next to the building.

Click on the 3 lines, select all locations. Scroll down and select the new location for employee.

- Click Start. A progress bar displays to guide you through the process.

- Click next on all remaining screens, click submit at the end.
- Your request will move to Employee Services for approval.
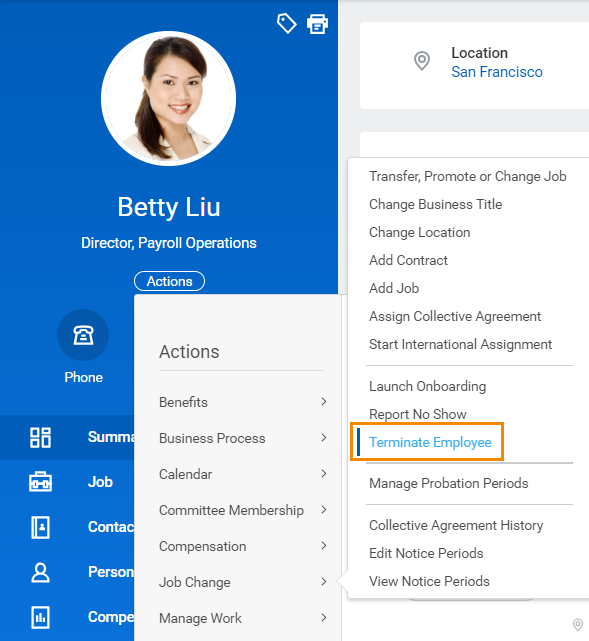
Terminate an Employee
As a manager, you may have to terminate an employee after they have been asked to leave or have resigned.
From an employee's profile:
- Select the Actions button.
- Select Job Change > Terminate Employee to display the Terminate Employee page.
Complete the required termination information. Here, you will enter a termination date and reason. The employee is still considered active until midnight on the termination date.
Indicate whether the position will be closed or available for overlap after this termination. Position overlap allows a replacement worker to be hired into the same position before the current worker leaves.
- Click Submit.
Change Contingent Worker Details
Contingent workers are defined as freelancers, independent contractors, consultants, or other outsourced and non-permanent workers who are hired on a temporary basis. You can change a contingent worker's details, such as hourly Rate. You can also change a worker's contract length if you want to extend their contract.
From the My Team application on the Home page:
- Select the contingent worker's profile.
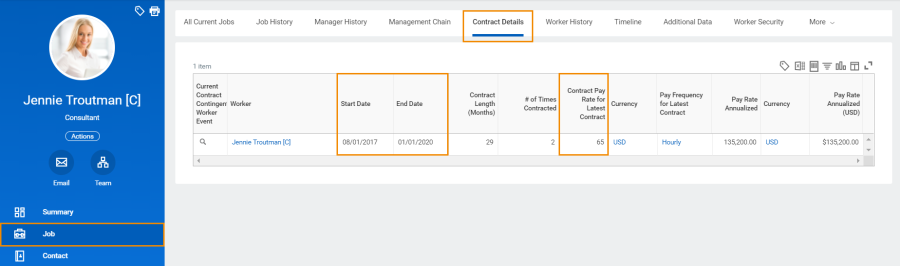
- Click the Job tab, then the Contract Details sub-tab. Here, you can view details, such as Contract Length and Pay Rate.
- Click the worker's Actions button.
- Select Job Change > Change Contingent Worker Details.
- Click the Edit icon.
- Enter the Effective Date and Reason for this change.
- Click Start.
- Follow the guided editor.
- Edit and select a new Contract End Date and Pay Rate, as needed.
- Click Next.
- Verify your changes and make any additional edits.
- Click Submit, then Done.
Convert Contingent Worker to Employee
You can also change a worker from contingent to full-time if you choose.
From the contingent worker's profile:
- Select the Actions button.
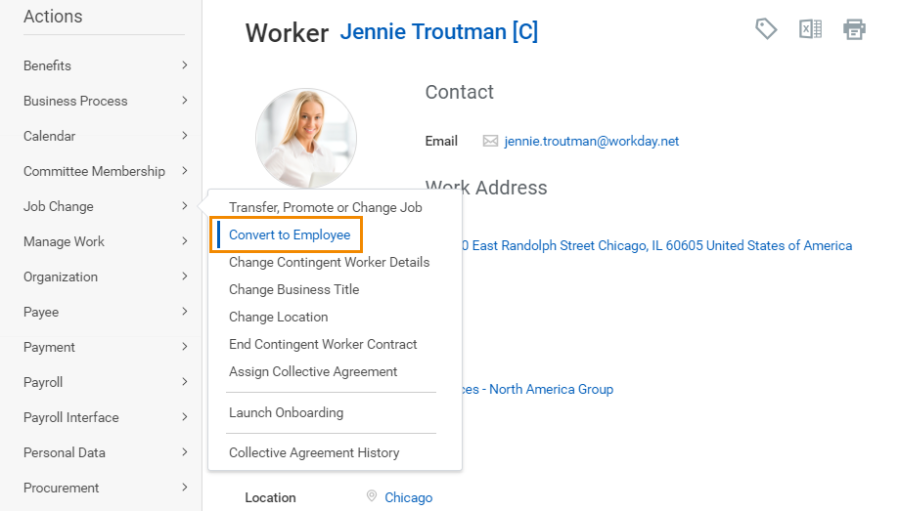
- Select Job Change > Convert to Employee.
- Select the supervisory organization to which you want the employee to belong.
- Click OK.
- Enter a Hire Date that occurs after the contract end date.
- Select the reason for hiring the employee.
- Enter job details such as Position, Employee Type, Job Profile, Time Type, Location, and Pay Rate Type.
- From the End Contract Details section, enter the Contract End Date. This field may have auto-populated.
- Select the reason for ending the contract, and lastly, enter the Last Day of Work. This field may have auto-populated as well.
Click Submit.