Lynn University will change its JPM Visa Card program starting July 1st, 2020. The instructions listed below are to verify Procurement card transactions. Please visit the Create Expense Report job aid to verify the Lynn Expense card (travel and meals) transactions. If you delegate the task to someone in your department, make sure you create a delegation first.
On this job aid:
View Procurement Card Transactions Verification
Edit Draft Procurement Card Transaction Verifications
Verify Procurement Card Transactions
- Log into Workday
- You can access the task via the search field or the Purchases application.
- To access the task via the Search bar, type Verify procurement, and select the Verify Procurement Card Transactions – Task. This will show transactions that still need to be verified.

- You can also access the task on your home page. Click on "Purchases"

- Under "Actions" in the left-hand column, select "Verify Procurement Card Transactions."

- The Company will default to "Lynn University," and the document date will default to today's date. All posted Procurement Card transactions to verify will be listed.

- Select the transaction(s) you'd like to verify by clicking on the box(es) under the "Select" column. You may also choose to verify all charges at the same time by clicking the "Select All" box. Click OK to continue.

- Each item will appear on the left menu. Select a transaction.

- On the right side of the screen, scroll down to view the transaction details.

- Enter the business expense description in the "Item Description" field
- Select the correct "Spend Category" from the drop-down list

- Scroll to the right transaction details bar to the right to find more details
Cost Center will default to your cost center, but that can be changed if needed to charge the item to a different cost center.
Note
If you are reallocating the expense to a different Cost Center other than your default, please select the new Cost Center first, and the related worktags will auto-populate.
")
- If the expense relates to a project, program, gift, etc. make sure to add them. Otherwise, leave blank.

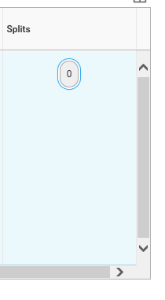
- You can split a charge by amount or by quantity. Scroll to the far right of the transaction detail information and click on "Splits." Select if you want the transaction to be split by the amount or by quantity.
Scroll down to attach your receipts by clicking on "Attachments" and selecting or dropping a file from your computer

- After reviewing that all the entered information is correct and accurate, click "Submit." You can also click "Save for Later" if you are not ready to submit the verified transactions and plan to continue at a later time.
- The "Next Step" is for the transaction to be routed to your Cost Center Manager for review.
View Procurement Card Transactions Verification
- Log into Workday
- You can access the task via the search field or the Purchases application.
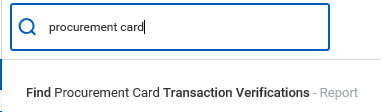
- To access the task via the Search bar, type Procurement card, and select the Find Procurement Card Transactions Verification – Report. This will show all transactions completed or draft mode. This option is recommended to view transactions for other employees, not only your own (security access permitted).
- You can also access your transactions by selecting the task on your home page. Click on "Purchases"
- Under "View" in the right-hand column, select "Procurement Card Transaction Verifications."

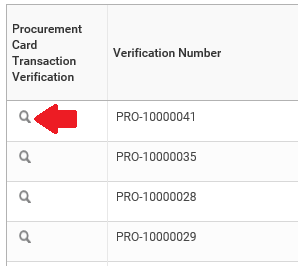
- Click on the magnifying glass next to the verification number to view the details.
Edit Draft Procurement Card Transaction Verifications
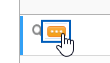
- To edit draft verifications, hover your mouse next to the magnifying glass and click on the related action items button.
- Click on Procurement Card Transactions, Click Edit.

- You can continue your verification where you left off.
