On this Job aid:
Academic plans can help students map out what courses they plan to take for one or more academic periods in the future, providing an opportunity for students and advisors to collaborate more easily. Additionally, students can use their academic plan to register for their courses once registration periods are open. Academic Plans are available for use by all Lynn students. Students will have a template that aligns with their program of study and can be personalized by your advisor.
Before traying to register for classes, make sure you do not have any holds that will prevent you from registering. Also check that registration appointments terms and dates are open to registration.
When registering for classes, start with the classes specific for your major: PSY, COM, BUS. Follow with Dialog courses (DSS, DBR, etc). Register for electives last.
Video
How to Register for Courses using Workday
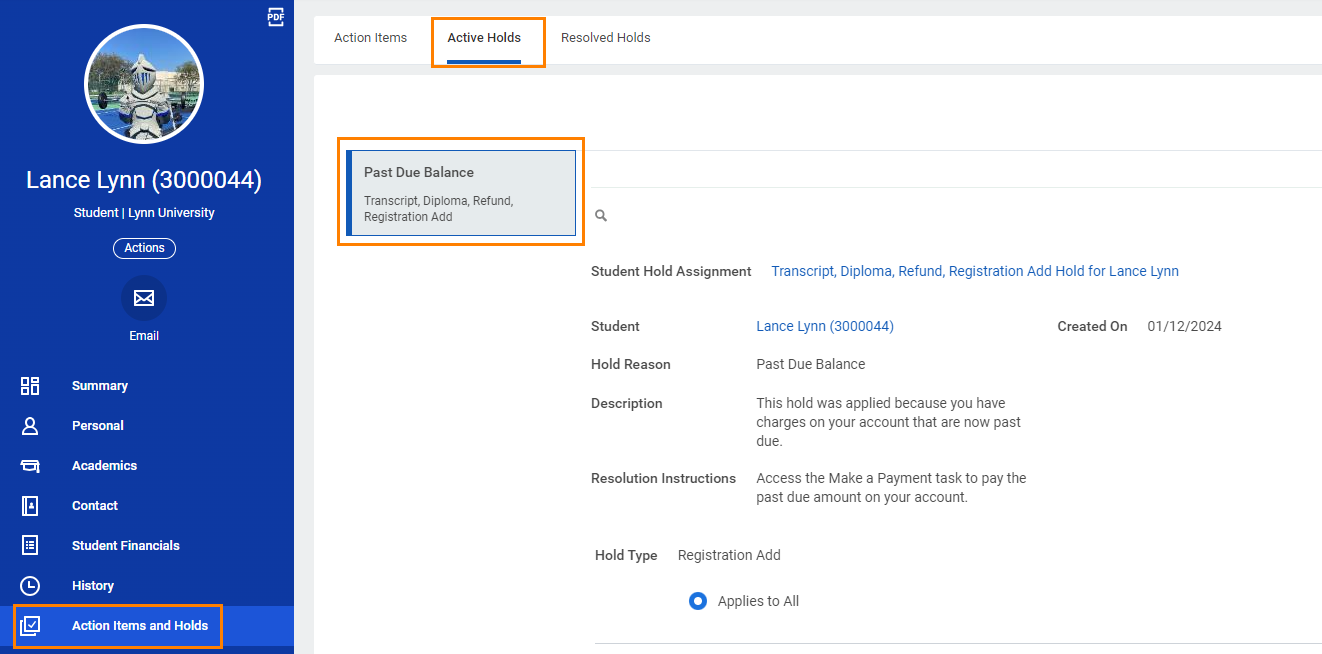
How to view Holds
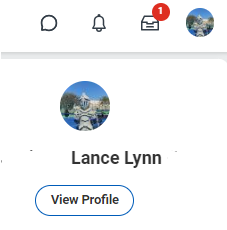
Select Profile icon at the top right corner to view students profile.
On your student profile, select Action Items and Holds, then select the Active Holds tab.
Any active holds will be displayed on this area.
Find Your Academic Plan
In the Student Profile, select "Academics" from the left menu.
Press on the Plan sub-tab.
Review your Academic Plan
If students don't see an Academic plan, they must contact their academic advisor or the Academic Advising Center at myadvisor@lynn.edu (561) 237‐7793
Academic Plan Components
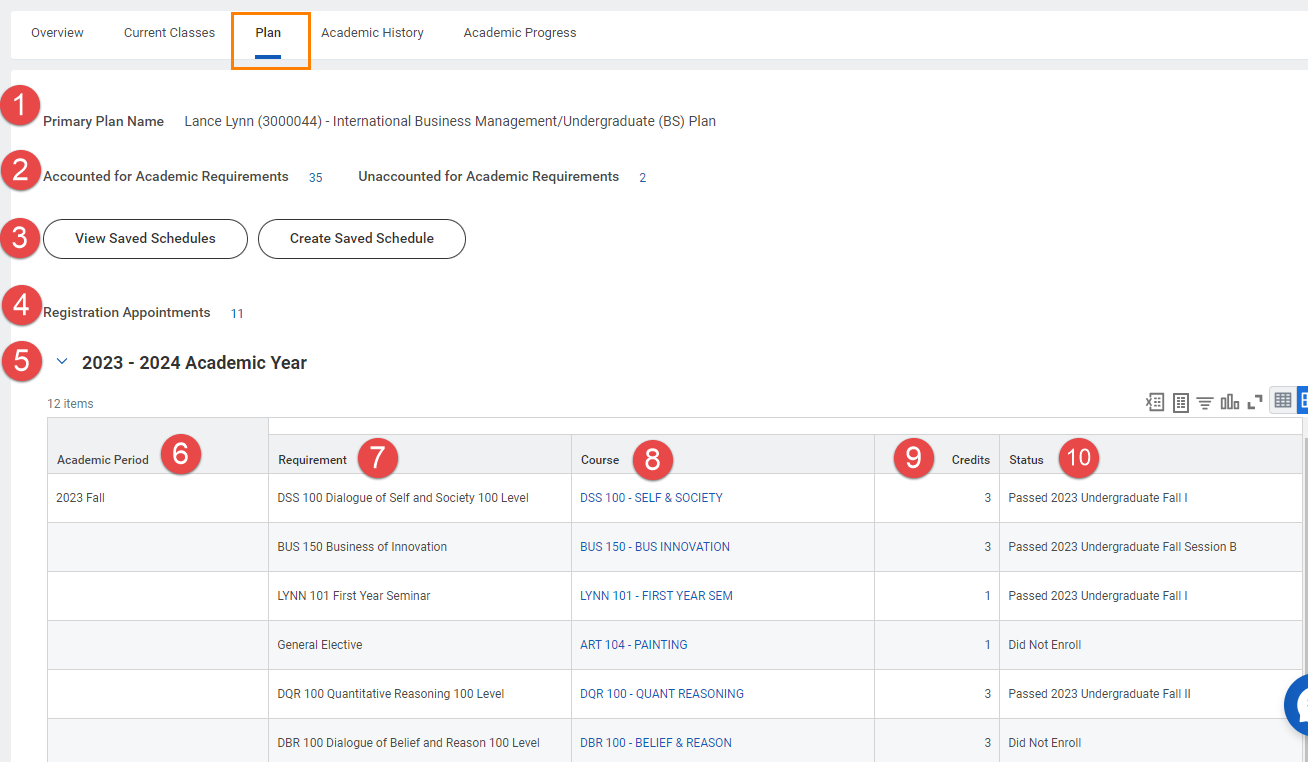
- Academic Plan Name
- Accounted / Unaccounted for Academic Requirements: Your academic plan is linked to your degree requirements and Workday keeps track of courses taken and those necessary to fulfill your degree requirements.
- View/Create Schedules: This functionality is currently not available to students.
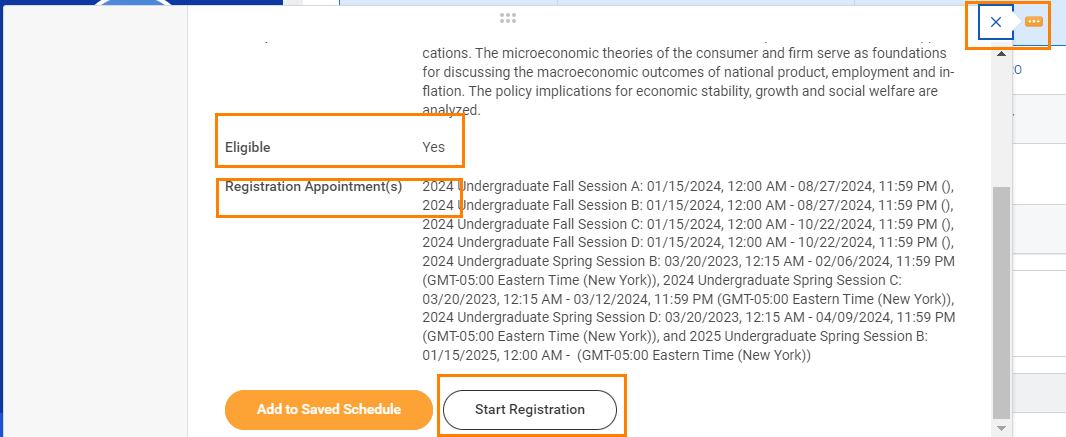
- Registration Appointments: Registration appointments will tell you what academic periods are available for you to register. It is a quick way to find out when you're eligible to being registering for classes. Click the number for a list of academic periods.
- Academic Year: You can expand or minimize the section to view all academic periods and courses included in your academic plan.
- Academic Period: List the academic period and a list of proposed courses to take.
- Requirement: name of requirement.
- .Course: course that counts towards the listed degree requirement and that you should register for in for that academic period
- Only the course names are listed. You will select the course section during registration.
- If no course is listed under a requirement, there may be multiple course options that fulfill that requirement (e.g. General Electives) Consult your academic advisor for assistance with course selection.
- Credits: amount of units you may earn by successfully completing the course.
- Status: identifies current course completion status:
- Passed: you completed the course with a passing grade
- Enrolled: you are registered for the course in the current/future term
- Did Not Enroll: you did not register for the course in the listed term.
- Eligible to Enroll: you meet the prerequisites for the course
- Not Eligible: you are not yet eligible for the course in the current term
Register from Academic Plan
From your Academic Plan, select courses with status "Did not Enroll" or "Eligible to Enroll"
Hoover your mouse next to the course name and click the related actions button (...)

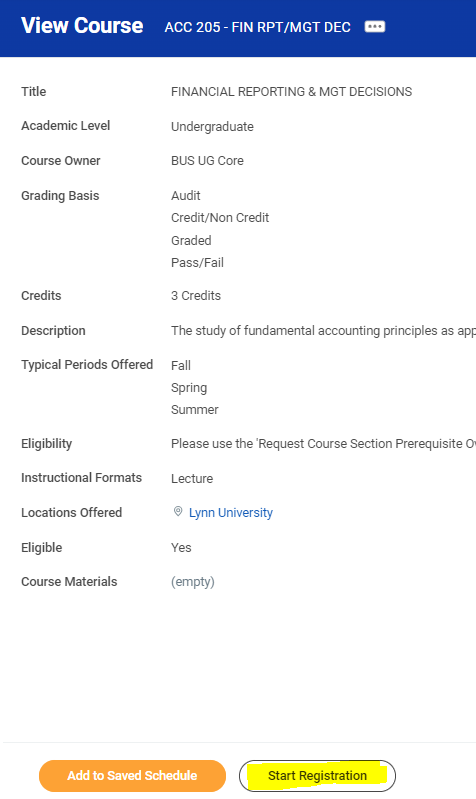
A new window will open with course details. If you are not eligible to take the course, it will display the eligibility rules for the course. It will also display the academic periods where this course is available to register.
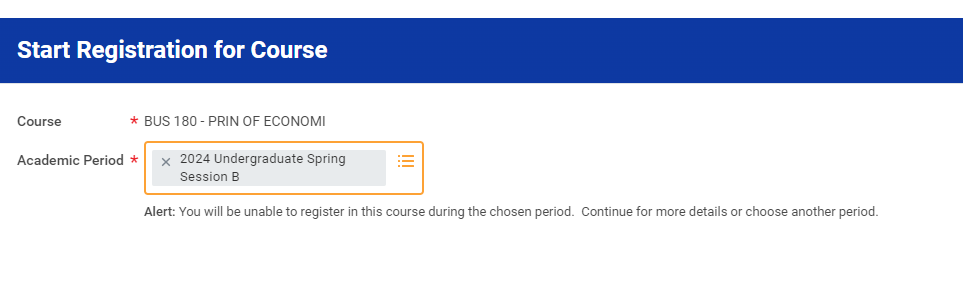
Click Start Registration
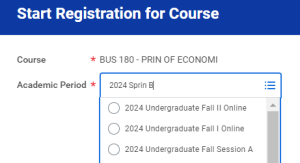
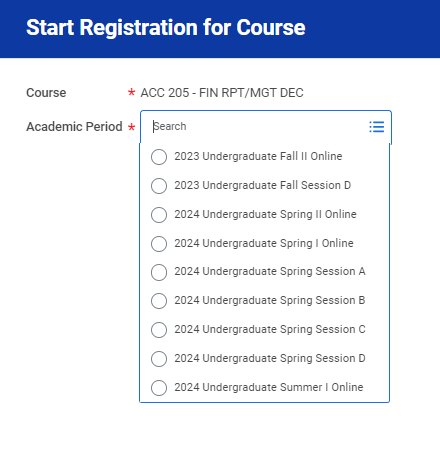
Enter the academic period. The list could be long. You can type shortcuts like "2024 Spring B" to look for the 2024 undergraduate session B and hit enter
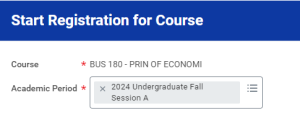
Verify the term and click OK
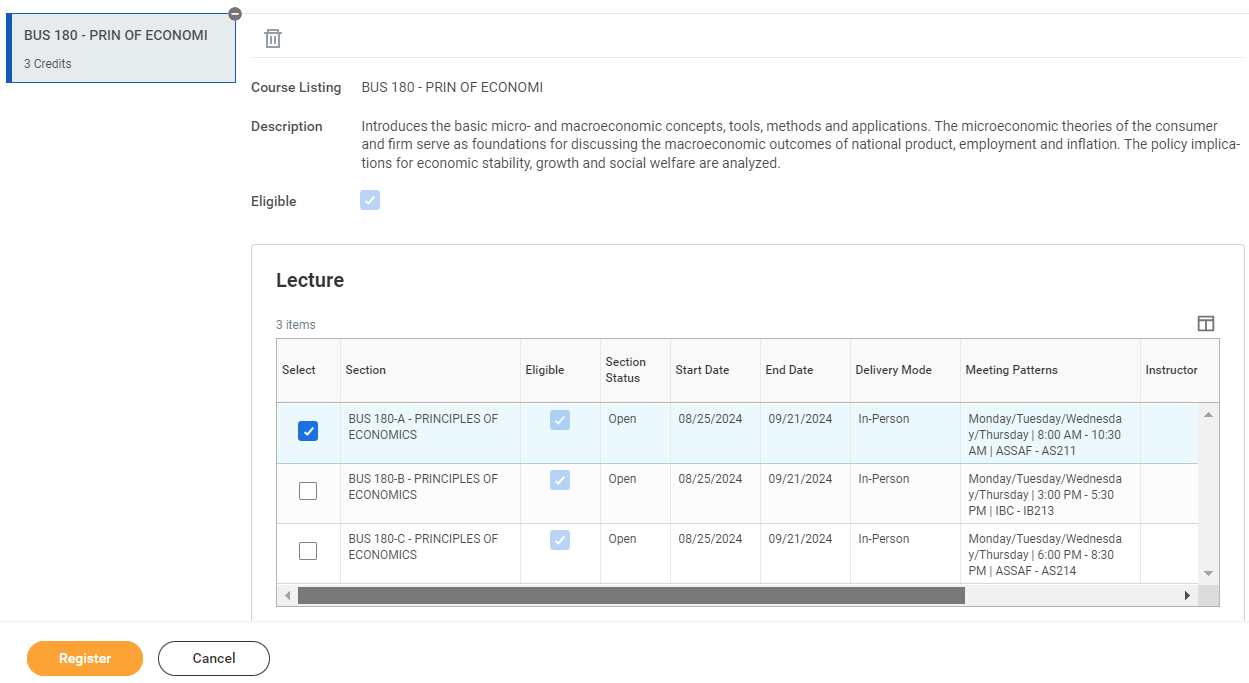
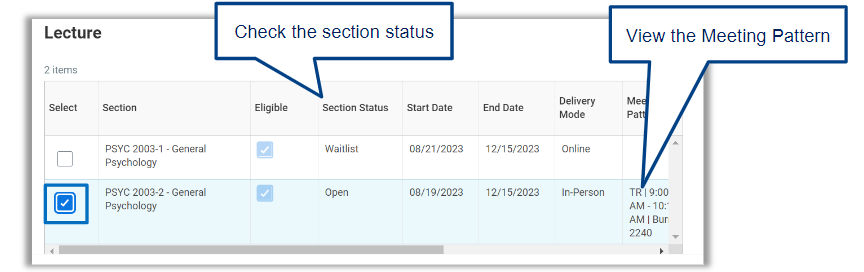
Students should review the open sections for each course and press the checkbox next to the one they want.
If the course offer to waitlist registrations, please review the Waitlist registration job aid
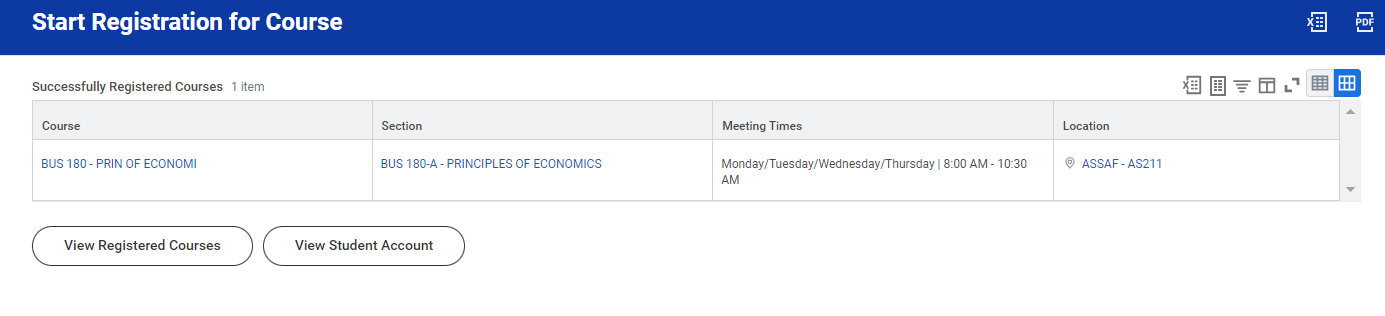
To officially register, press Register.
![]()
Students will be able to see the courses for which they have registered for, with buttons to view the courses, or view their account.
Go back to your plan, select another course and follow the previous steps to register for other courses.
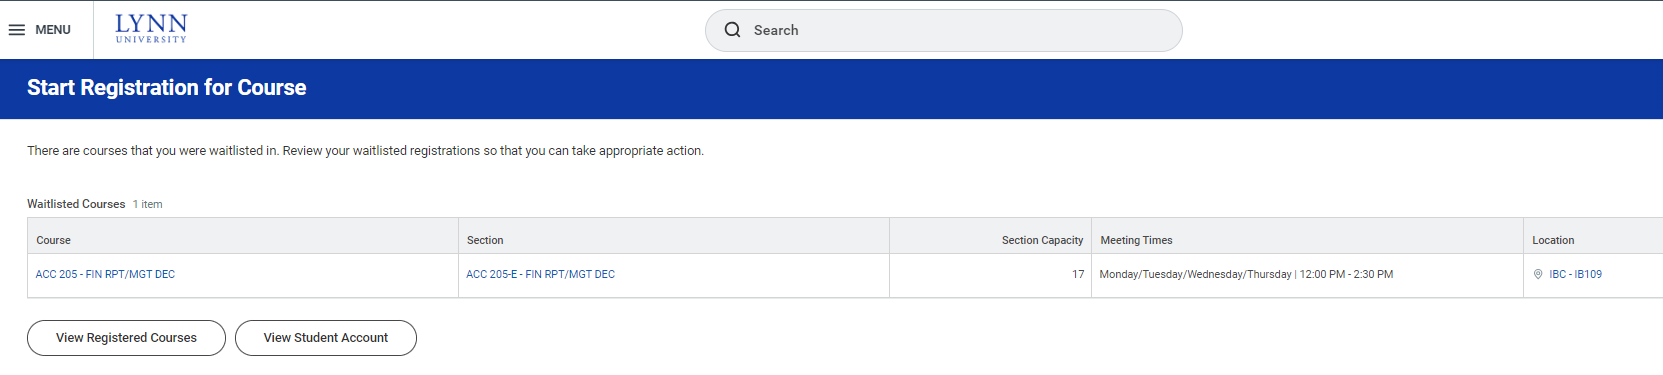
Register for Waitlisted Courses
On student plan, Student select course to register

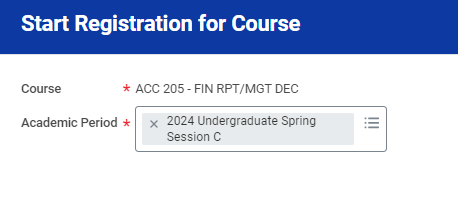
Click Start Registration
Select Academic Period
Click OK
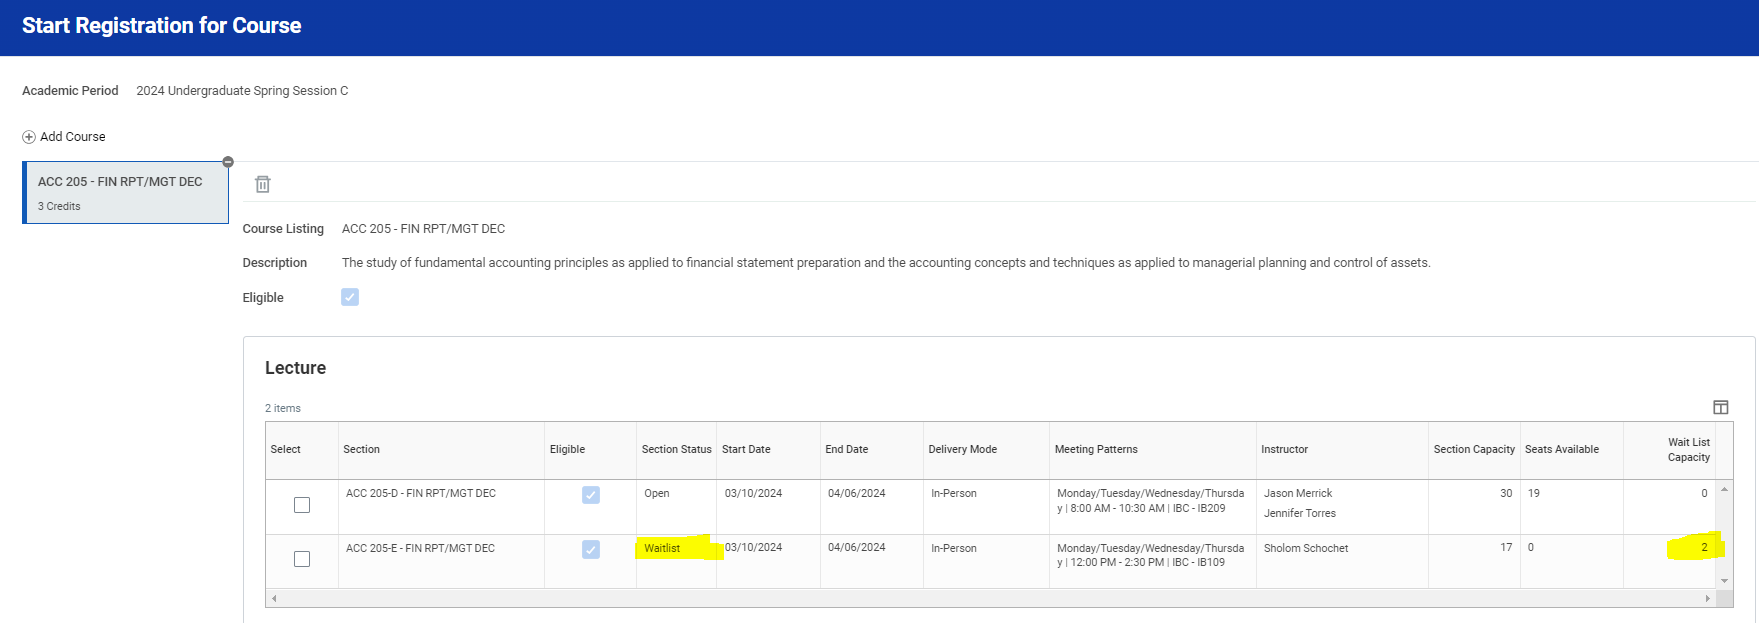
Student will see section status available as waitlist and the capacity
Select and register for waitlisted course
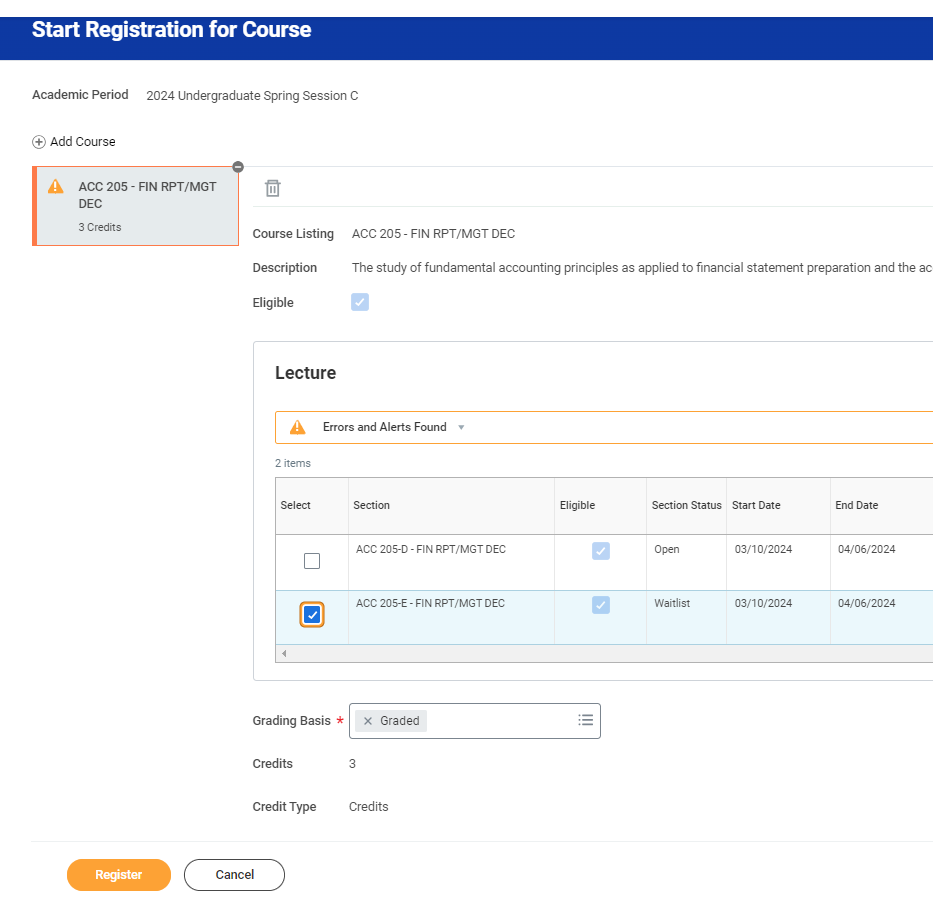
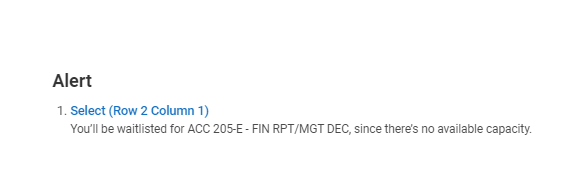
An alert will display student will be waitlisted. Click OK
A confirmation page will display waitlisted course
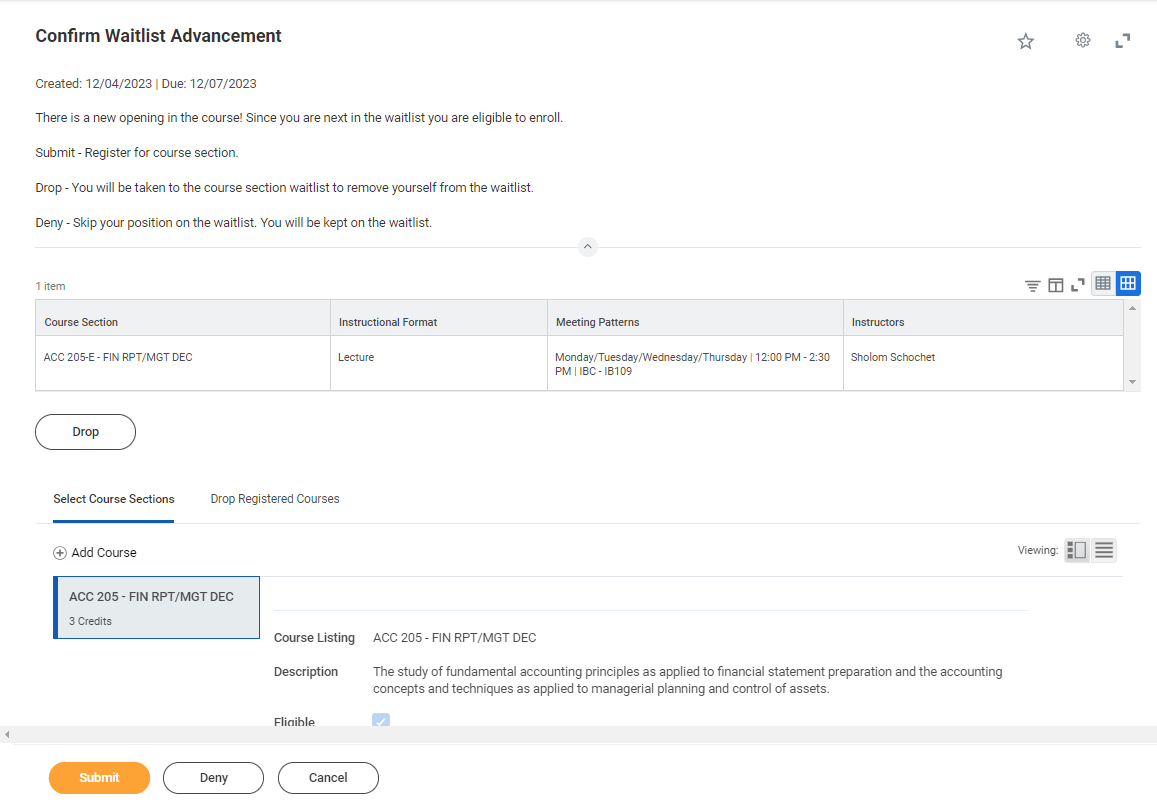
When a space becomes available, student has 48 hours to act or lose their place on waitlist. Students will receive a notification on their task inbox.
Student has 3 options, Drop, Submit or Deny.
Click Submit to register in the course
Click Drop to dismiss your waitlist request
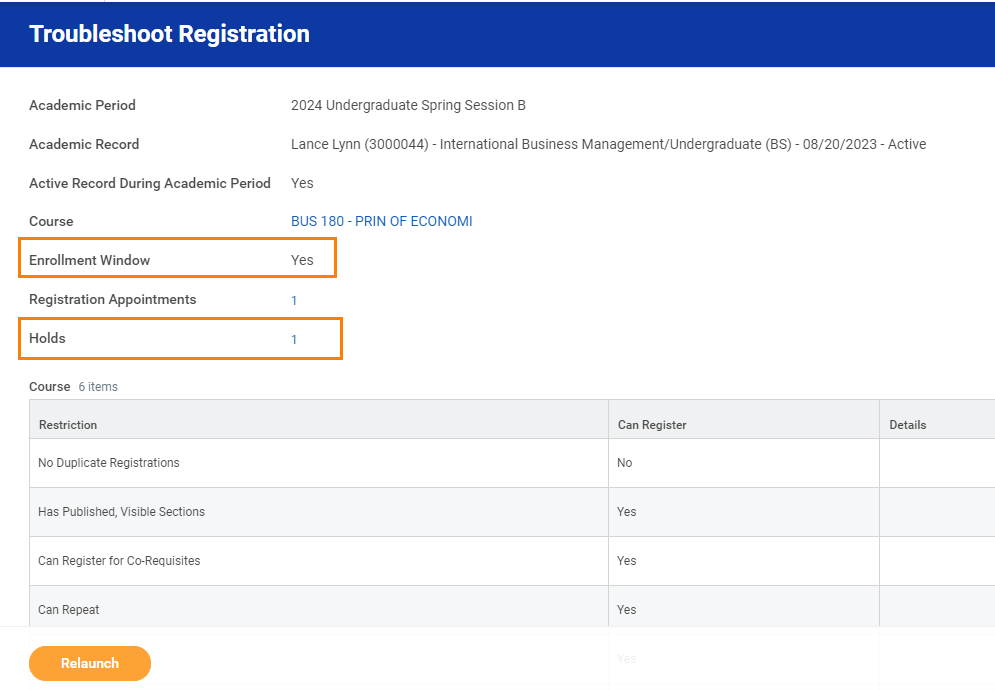
Registration Errors
If you get an error message, you will not be able to register for the course.
Click Ok for the troubleshooting registration window.
In this case, although the student is within the registration window, he has a registration hold that prevents him from registering.