Your Worker Profile page displays information about you, including your office location, phone number, and compensation. Note that the visibility of sensitive information is controlled by individual users' security profiles.
To access your Worker Profile page, click your Profile icon > View Profile.
...
| Info | ||||
|---|---|---|---|---|
|
...
All instructions in this job aid start from the Worker Profile page.
|

Add or Change Your Contact Information
- Click the Contact tab on the left. The Contact subtab is selected.


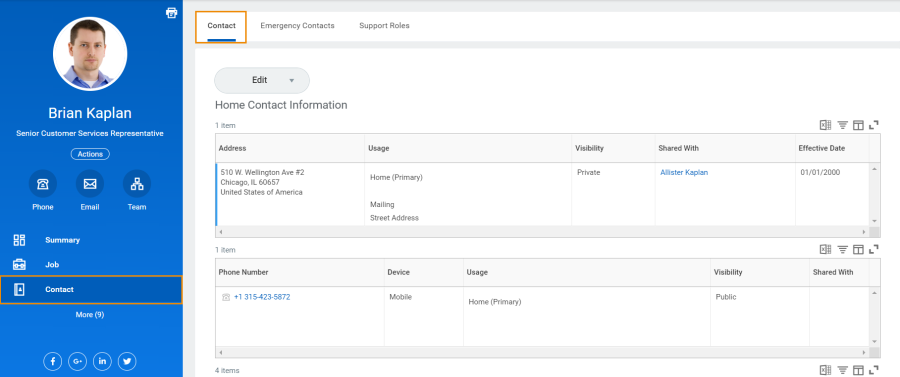
- Click Edit and select Change My Home Contact Information to change your personal contact information. Within each section, click the Edit icon
 to change existing information or click Add to add new information. You can also click within a field to edit.
- Click Submit and Done to save your changes.

Add or Change Emergency Contacts
...
- Click the Contact tab.
- Click the Emergency Contacts subtab.

- Click Edit. Enter or modify your emergency contacts.

- Click Submit and Done to save your changes.
...
- Click the Personal tab. The Personal Information subtab is selected.

- Click Edit.

- Enter or modify your personal information (Gender, Marital Status, Race/Ethnicity, etc) .

- Click Submit and Done to save your changes.
...
- Click the Personal tab.
- Click the IDs subtab. You cannot make changes to this information; you can only view it.

- Click the Documents subtab. Click the document links to download or view documents. Click Add to attach documents to your profile, Edit to make changes to documents, or Delete to remove them.
...
- Click your Related Actions
 button.
 - Select Personal Data > Change My Legal Name.
- Enter your new information, including any required informationattachments.

- Click Submit.
- Click To Do and Submit to submit proof of your name change or click Done to submit later.
...
- Click your Related Actions button.
- Select Personal Data > Change My Preferred Name.
- Clear the Use Legal Name as Preferred Name checkbox.

- Enter your new information.
- Click Submit and Done.
...
- From your Related Actions, click Personal Data > Change My Photo.
- Click the Select files button to locate, crop, and upload your image, or drag and drop your image directly into the Attachments section from your local drive. You can crop and adjust the image by dragging the corners to the desired specifications. The portion of the image within the unshaded circle represents how your photo will look on your profile page.
- Click OK and Submit.
Depending on your organization's configuration, you may need further approval before the change takes effect.
...
| Info | |||
|---|---|---|---|
|
...
|
...
The supported file formats |
...
are .png and .jpg. |
Add and View Your Social Networks
- From your Related Actions, click Personal Data > Social Networks.
- Click Edit to change an existing network, or Add Social Network Account to add a new one. You can maintain up to four networks.
- Enter the social network and user name or web address you want to add. You can only add one account for each social network.
- Click OK and Done.
...
- From your Related Actions, click Job Change > Change My Business Title.
- Enter the Effective Date.
- Enter the proposed Business Title.
Click Submit and Done.

Info icon false title Note Any changes to business title will be routed to your supervisor and Employee Services for approval. This business title may not be the same as the title on your job profile.
Manage Worker Profile Summary Information
You can enhance your Worker Profile with details of your professional experience.- Click the Job tab. The Professional Profile subtab is selected.
- Click + Add next to a section.
- Add your own information or edit existing information, including your statements, job history, education, skills, and internal projects.
- Click Submit and Done.
...
- Click the Job tab. The Professional Profile subtab is selected.
- Click the Upload button under Upload My Experience.
- In the Upload File area, click Select files to browse for a file. You can also drag your file into the region.
Click OK and Done.
:Info icon false title Note Workday initiates a background process to upload your Professional Profile data. After the process has completed, a notification displays.
- From the notification, click the Click Here link to review and complete the profile data.
- Use the guided editor or the Summary section to validate and refine your uploaded data.
- Click Submit and Done.
...