...
Request Consent for Electronic 1098-T
 Consent 1098T
The 1098T form is prepared every January to report to the IRS how much tuition you paid for the previous tax year, and how much you received in scholarships, if applicable.
| Expand |
|---|
| title | Click here for description... |
|---|
|
Description | To Do |
|---|
The 1098T form is prepared every January to report to the IRS how much tuition you paid for the previous tax year, and how much you received in scholarships, if applicable.
| By signing your consent to receive your 1098T form electronically, you are electing not to receive a paper form in the mail. When your 1098T form is ready, you will receive a notification with instructions how to access the form in Workday. Need Help? Contact Student Financials +1 561-237-7504 | studentaccounts@lynn.edu |
|
...
| Expand |
|---|
| title | Click here for description... |
|---|
|
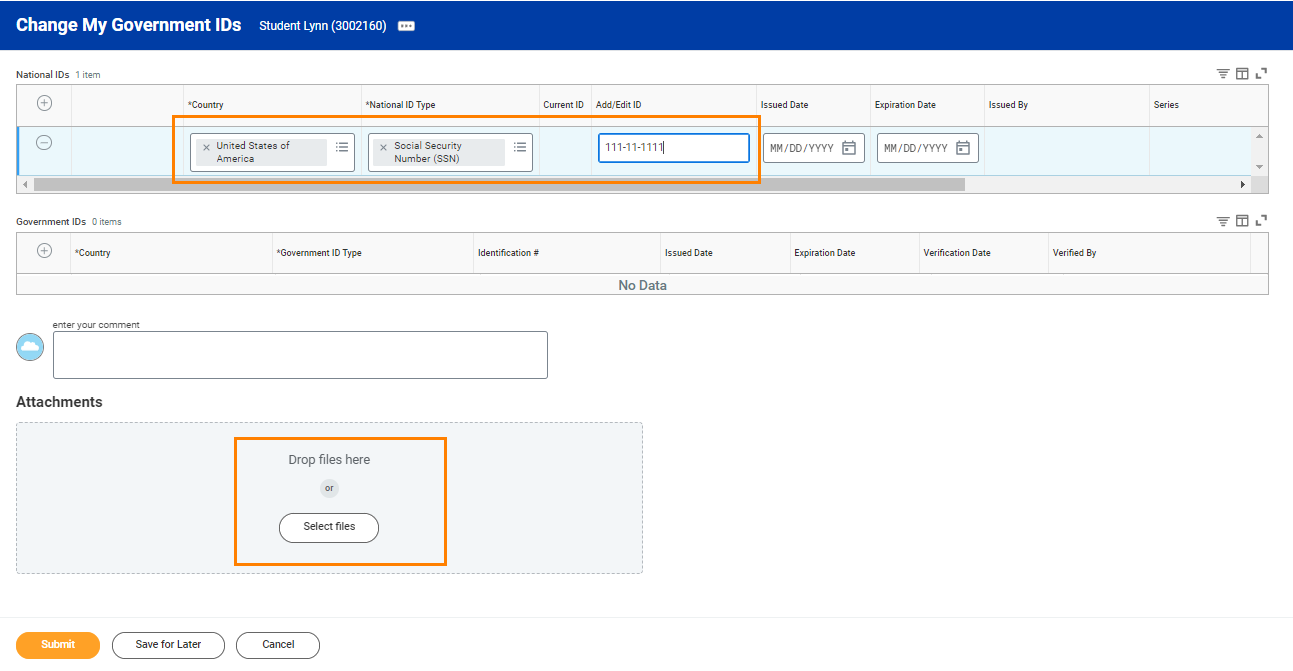
Description | To Do | During the Onboarding process in Workday, US citizens are required to input their Social Security Number (SSN) as part of the Edit Government IDs task. International students can also update their TIN number using this task. - Select “change my government IDs”.
- In the “National IDs” section, click on the + sign.
- In the Country section, type/choose “United States of America”.
- In the National ID Type section, choose “Social Security Number (SSN)” or "U.S. Individual Taxpayer Identification Number (ITIN)".
- In the Add/Edit ID, type in your Social Security/TIN Number. Note: Please proof for errors and be sure that the number you are entering is accurate!
- Scroll down and attach a copy of your SSN card.
- Select document category "ID Verification"
Please do not enter comments in the comment fields as they are not monitored.
| - Note: Please proof for errors and be sure that the number you are entering is accurate!
- You must attach a copy of your SSN card.
- Select document category "ID Verification"
Need Help? Contact the Registrar's Office +1 561-237-7303 | registrar@lynn.edu |
|
- Select “change my government IDs”.
- In the “National IDs” section, click on the + sign.
- In the Country section, type/choose “United States of America”.
- In the National ID Type section, choose “Social Security Number (SSN)” or "U.S. Individual Taxpayer Identification Number (ITIN)".
- In the Add/Edit ID, type in your Social Security/TIN Number. Note: Please proof for errors and be sure that the number you are entering is accurate!
- Scroll down and attach a copy of your SSN card.
- Select document category "ID Verification"
 Goverment ID
...
| Expand |
|---|
| title | Click here for description... |
|---|
|
Description | To Do |
|---|
Friends and family include individuals you would like listed as emergency contacts as well as any individuals you would like to view your selected academic and/or financial records and/or make payments on your behalf. Please use the Add button to add an individual. You will be required to add at least one method of communication for each person listed.
| Please review the friends and family information Students are required to have at least one emergency communication contact. For Emergency Contacts, you must enter an address and a phone number. For Third Party Users you must enter an email address. Please keep this Need Help? Contact the Registrar's Office +1 561-237-7303 | registrar@lynn.edu
|
|
Click the Add button to add an individual. You will be required to add at least one method of communication for each person listed.
...
 review Friends and Family
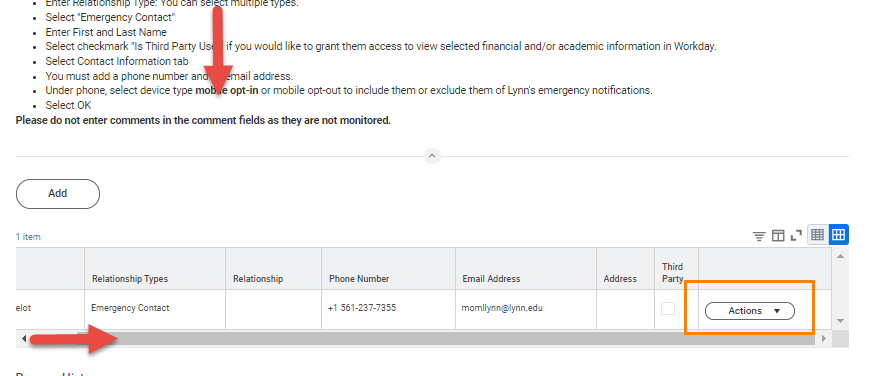 Image Removed
 Image Removed
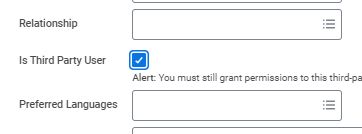 Image Removed
 Image Removed
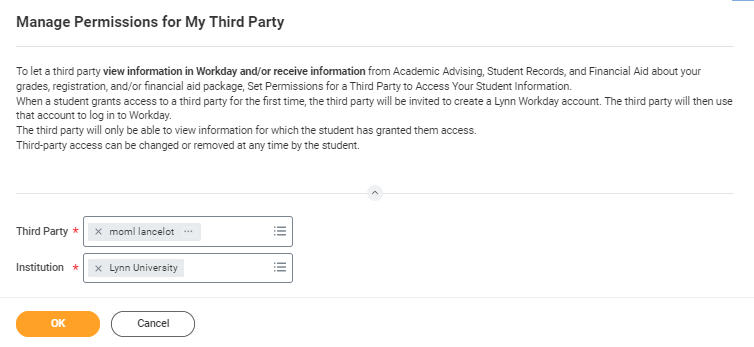 Image Removed
 Image Removed
...
To provide third party access to your records you must first select contact as third party user, then manage permissions for user.
- On the third party record, scroll to the right and select Actions button.
Image AddedActions button
- Select Edit Friends and Family
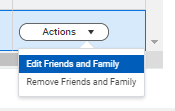 Image Addededit friends and family
- Select Is Third Party User (specific permissions will be granted in the next steps). Click OK.
Image Addedis third party user
- On the contact record, scroll to the right. Select Action button. Select Manage Permissions for My Third Party
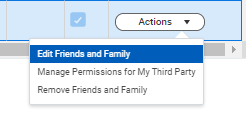 Image Addedmanage permissions
- Verify Third party name, click OK
Image Addedverify third party
- Select Allowed next to the specific task to grant permissions to third party. Click Ok.
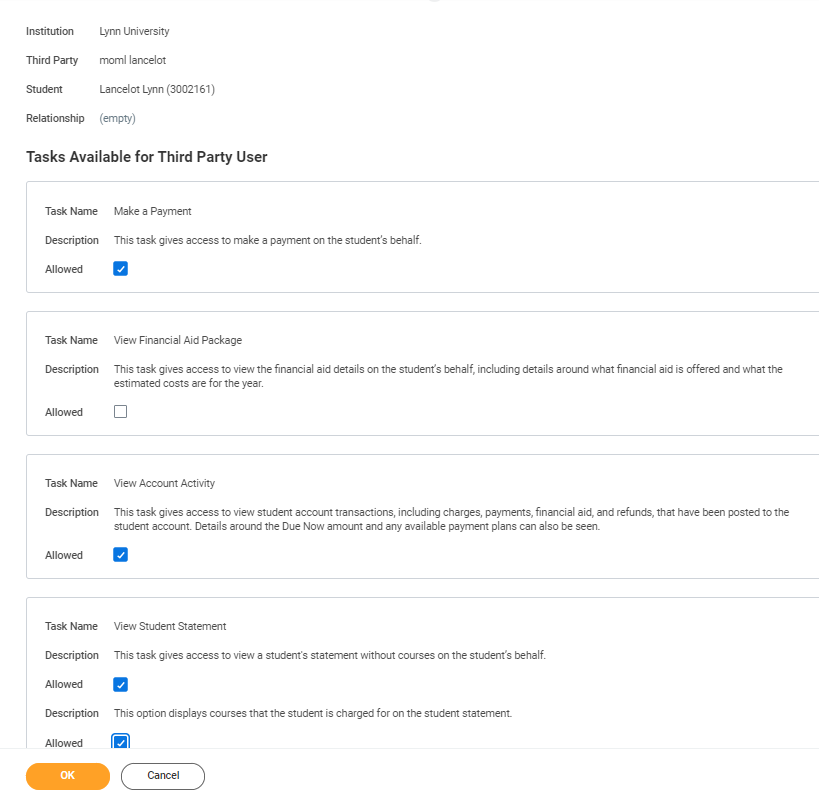 Image Addedpermissions
- Under Purpose of waiver, type your comments to confirm access to the third party. Click Confirm. Click OK
 Image Addedprivacy release
Review of Student Residency
...