...
On this Job Aid:
Table of Contents
Create an Expense Report (includes Lynn JPM travel expense card)
All expense reimbursements and Lynn JPM expense visa card verification require to submit an expense report in Workday.
...
- Click the Create Expense Report button under Actions.
- Select either Create Expense Report. Your selection determines what information displays on the new expense report.
Select Create a New Expense Report. You copy previous expense reports and modify specific items. If you have a spend authorization (cash advance) approved, you will have the option to select the authorization to create the expense report (see spend authorization section).
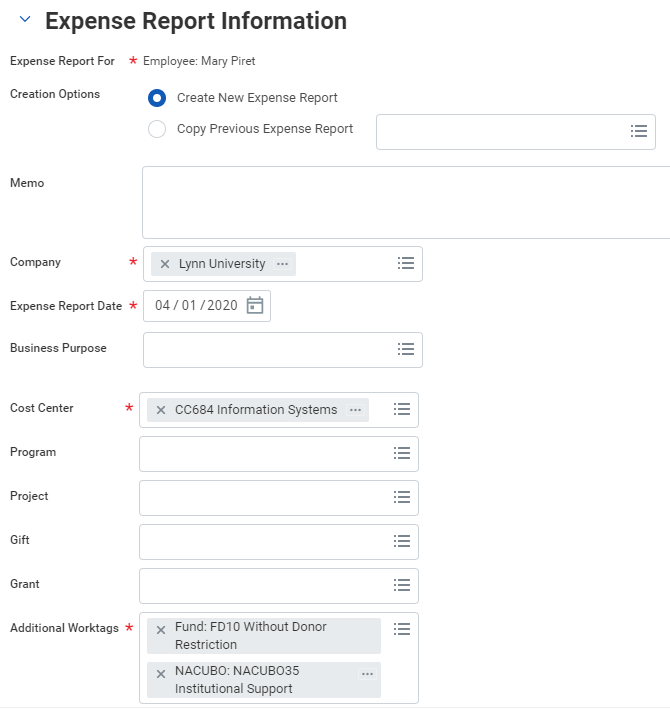
Complete all required fields for the expense report information, including Date, and Business Purpose. If you are creating the expense report on behalf of someone else, make sure the correct cost center is selected.Info icon false title Note Cost Center refers to the department charged for the expense. By default, every employee is assigned to a cost center, and your expense will bring that default cost center for approval routing.
For Additional Worktags, see the Worktags section below for Project, cost center, and/or location to be associated with your expense report.
Add Transactions
There are 3 ways to add transactions to your expense report:
Uploading receipts via your mobile device (Quick Expense)
Selecting Credit Card transactions (Lynn JPM travel T-EXP brown card holders)
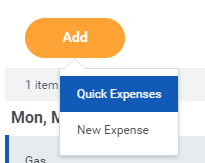
Click Add / New ExpenseIf you added items from a mobile device to process later, a list of those items would display under Quick Expense
.
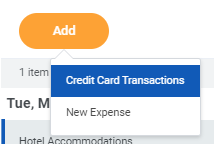
For Lynn JP Morgan Expense cardholders, your expenses will show under Credit Card Transactions.
Info icon false title Note JP Morgan expense card transactions will not generate reimbursements to employees. They will follow the department approval process and will debit the department cost center.
- Click OK.
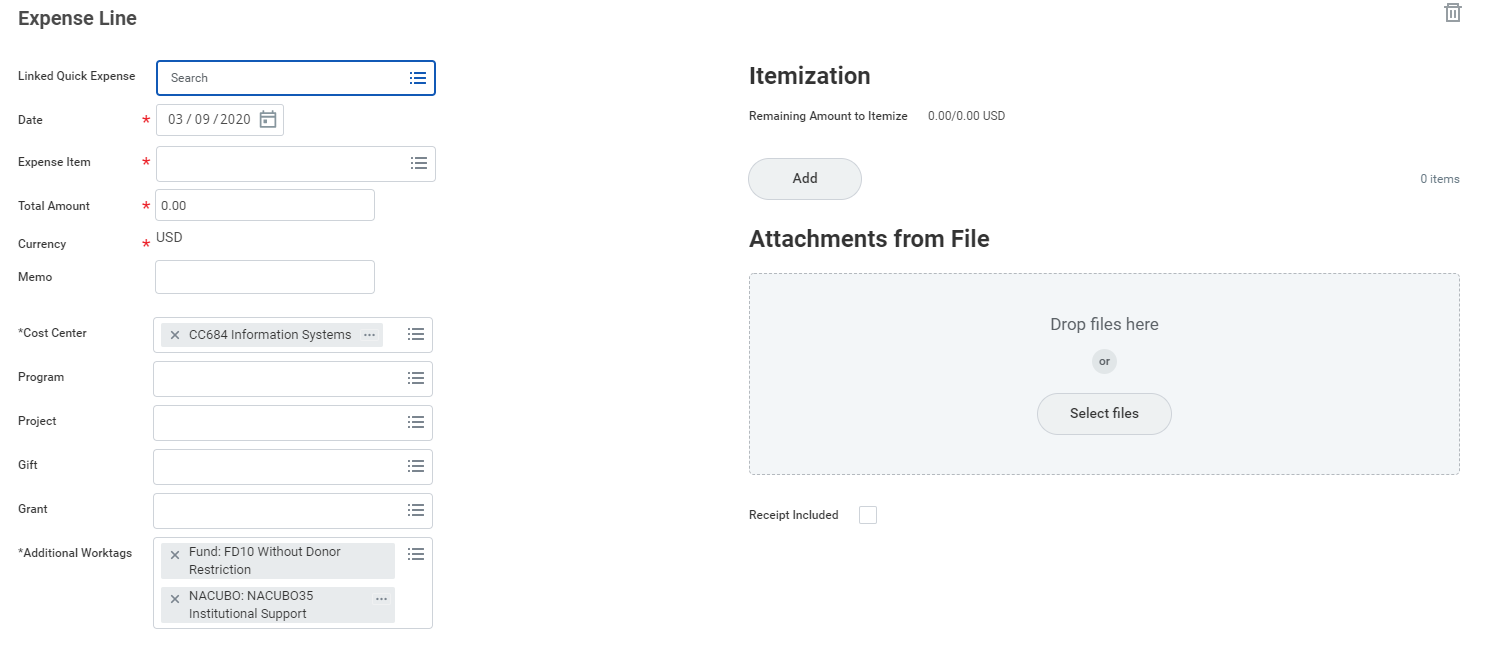
A window will open to report the expense items/lines.
You can also click plus sign to add an expense. NOTE: Your options will change depending on what is available to you. If you have quick Expenses or Credit Card items not added to any expense report, you will be able to select them.
or
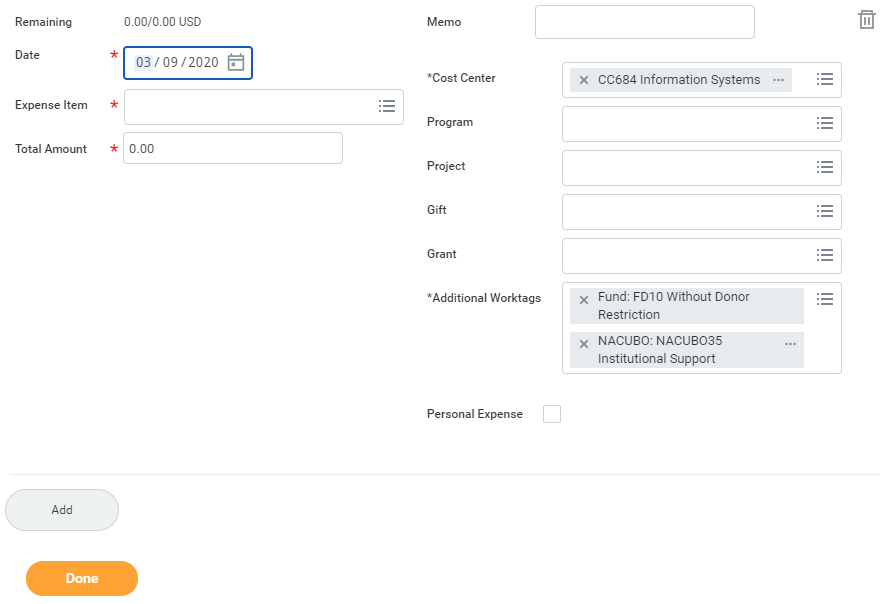
Fill in the expense line. Items with a red asterisk are required. Drag and drop or click select to add your receipts into Attachment from the file area.
- Repeat items 7 and 8 until you added all your expense items.
- If you need to delete and item from the expense report, click the delete icon on the top right.
- Once you add all items, click Submit.
Add Worktags
Workday use "worktags to organize information. Worktags are keywords that provide reporting dimensions or metadata for your expense reports. Expenses can also be charged to a specific project, program, or gift a worktag that can be assigned on creation. These worktags will also route the expense to the Project, program, or gift manager for approval.
...
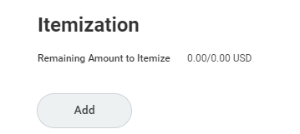
- Click the Add button under Itemization.
- Fields display based on expense type. Enter the necessary information, based on the expense type you are itemizing. Your itemized expenses must equal the total of your Expense Report Line.
- Click Done.
View an Existing Expense Report
From the Expenses application:
...
- Click the Attachments tab.
- Drag and drop files from your desktop, or click the Select files button to upload one or more files.
- Click Submit.
View an Existing Spend Authorization
From the Expenses application:
...
Enter Expense and Submit Expense Report
iPhone
Use the Expenses app to track expenses, upload receipts, and submit expense reports.
From the Home screen:
...
- Tap Create Expense Report.
- Include required information, such as Company, Expense Report Date, Cost Center, and Region.
- Tap the Additional Worktags prompt. Add information your organization may require, like Location and Project.
- To add a Project, tap Project from the Additional Worktags prompt.
Select your Project, then tap Done.
- Once you've completed the expense report information, tap Done.
- Tap New Expense to begin attaching expenses to the report.
- Tap Existing Expenses. You can also choose to add new expenses in this step by tapping New Expense.
- Choose the pre-existing expenses you want to include in the report by tapping the checkmark next to each expense item you saved.
- Tap Next.
- Tap Review.
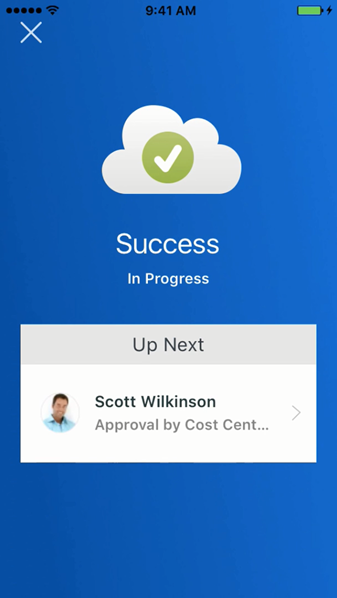
Review your expense items for accuracy, correct any errors, and then tap Submit. A confirmation screen shows your expense report has been routed for approval.
Info icon false title Note You can also add expense items to reports from your list of expenses by tapping the checkbox and Add to Report. This will display immediately after entering the expense item. If no report exists at this time, you'll be prompted to create one.
iPad
Use the Expenses app to track expenses, upload receipts, and submit expense reports.
From the Home screen:- Tap View Apps > Expenses.
- From here, you can tap Scan Receipt to scan your receipt and have Workday automatically add expense data, or tap Enter Quick Expense to fill in expense information manually. You can also tap Create Expense Report to start a new expense report.
- Tap Enter Quick Expense to enter the expense manually.
- Tap the Paperclip icon to choose a photo or import an attachment.
- Enter a Date (this may have auto-filled when creating the expense).
- Add the Expense Item, along with any other supporting information for the expense.
- Tap Done, then Save (the newly entered expense should save automatically).
...
- Tap Available Expenses from the Expenses application.
- Tap the checkmark icon to add the expense item to an Expense Report.
- Tap the Add to Report button, then Create New Report.
- Include required information such as Company, Expense Report, Date, Cost Center, and Region.
- Optionally, tap the Additional Worktags prompt. Add information your organization may require, like Location and Project.
To add a Project, tap Project from the Additional Worktags prompt, then select your Project.
- Tap Done.
- Tap Review.
Review your expense items for accuracy and correct any errors, then tap Submit. A confirmation screen shows your expense report has been routed for approval.
Info icon false title Note Upon review, you may be prompted to enter Business Topics into the expense item details. Enter the topic into the prompt, tap Save, and Review to continue processing your expense report.
Training Video
Create Expense Report Video


