On this job aid:
View Time Off and Leave of Absence
View Time Off and Leave of Absence Balances as of a Certain Date
Submit Time Off and Leave of Absence Requests
Anchor view_absence view_absence
View Time Off and Leave of Absence
| view_absence | |
| view_absence |
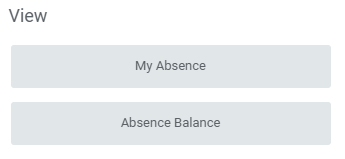
From the Absence application:
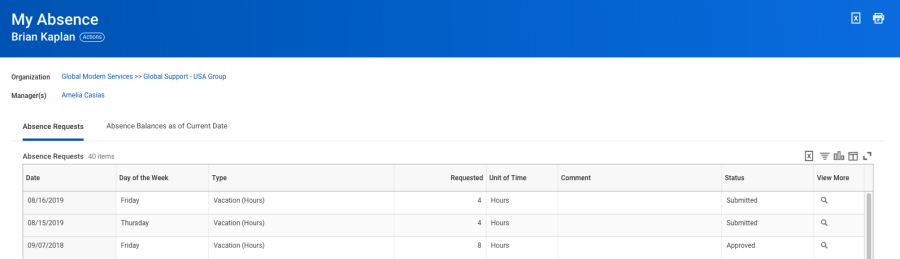
- Click My Absence under the View section.
- A report of your Absence Requests displays.
...
- The first tab will display your absence requests.
- Click the Absence Balances as of Current Date tab to see your absence balances as of today's date. Depending on the type of absence plan, Workday tracks balances in either days or hours.
| Anchor | ||||
|---|---|---|---|---|
|
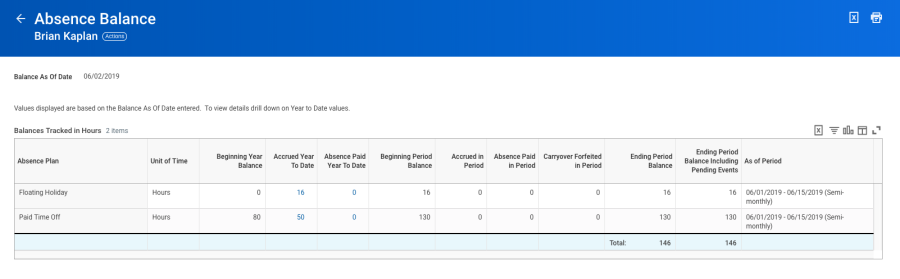
View Time Off and Leave of Absence Balances as of a Certain Date
| Info | ||||
|---|---|---|---|---|
| ||||
You can set a date in the future to view your available time as planning tool. You may not be able to view the balance for all absence types. |
From the Absence application:
- Click the Absence Balance button under the View section.
- Enter a date in the As Of field.
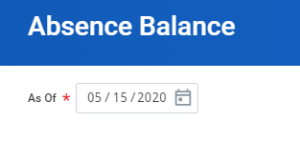
- Click OK. The report Balances As Of Date displays reflecting the dates entered. Depending on the type of absence plan, Workday tracks the balances in either days or hours.

Submit Time Off and Leave of Absence Requests
From the Absence application:
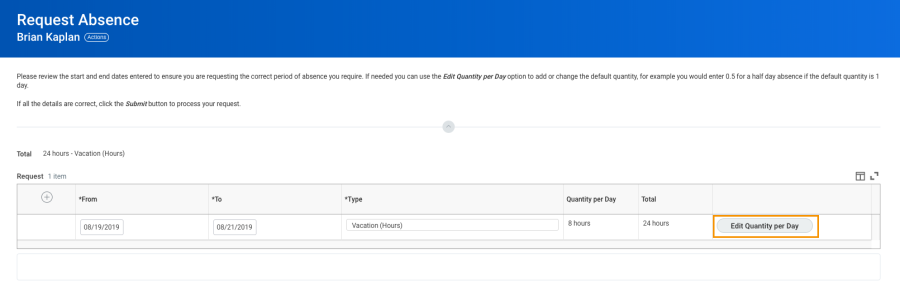
- Click Request Absence under the Request section. The unified absence calendar displays.
| Note: Depending on your organization's configuration, you may be able to see other coworkers' absence requests by clicking View Teams. This gives insight into when coworkers will be absent and decreases the likelihood of too many workers being out at the same time. |
- Click the day you wish to take off or click and drag to select multiple days. Click a selected day to deselect it.
- (Optional) Click the Select Date Range button to enter an extended date range. This is useful when entering an absence request that might extend into a different month or over a long period.
- Click Request Absence. The number of days you requested dynamically displays on the button to help confirm your request.
- Select the Type of absence requested. Your options will include both time off and other absence types.
- Click Next.
- The Quantity per Day may default to a set amount or to your daily scheduled hours, depending on whether balances are tracked in days or hours.
(Optional) To change the Quantity per Day amount, click Edit Quantity per Day. Enter the desired amount and any needed comments. You can also update all quantities to the same amount at once, using the Update All Quantities field. Click Done.
Note: Depending on your organization's configuration, managers can include optional or required start and end times with a worker's time off request. This helps managers know when in the day the worker will be taking time off and better plan for absences within teams. Another feature, depending on your organization's configuration, can display the worker's position information alongside the worker's name in the Time Tracking and Absence application.
- Attach any appropriate supporting documents by dragging them to the Attachments field or clicking Select files.
- Click Submit. You can view the status of your request at any time by returning to the My Absence report.
...